Xcode IDE allows duplicating targets so we can use the same source base for multiple applications.
Here are the steps to do that, considering the “Toolset” as the main target and “Toolset Lite” as a duplicate target.
Step – 1

Step – 2

Step – 3
Step – 4

Step – 5

Step – 6

Step – 7

Step – 8

That’s it you are done with the creation of the duplicate target. Now if you would have to distinguish between targets in code level you have to follow a few more steps mentioned here
Here are the steps to do that, considering the “Toolset” as the main target and “Toolset Lite” as a duplicate target.
Step – 1
- Go to project settings
- right click on the desired target to be duplicated
- choose “Duplicate” (or) alternatively use cmd+D.
Step – 2
- In the next dialog box shown choose “Duplicate Only”.
Step – 3
- Right click on duplicate target
- Choose “Rename”
- Rename the duplicated target with proper name (“Toolset copy” to “Toolset Lite” here)
Step – 4
- Close all the opened trees in project navigator except project tree
- Once closed Right click on the new plist file
- Choose “Rename”
- Rename the plist with a proper name and make sure you copied tha name
Step – 5
- Go to new target’s build settings.
- Search for word “copy”
- In setting named “Info.plist File” set the same name by pasting the name of plist.
- In setting named “Produce Name” give the name same as target name (“Toolset copy” to “Toolset Lite” here)
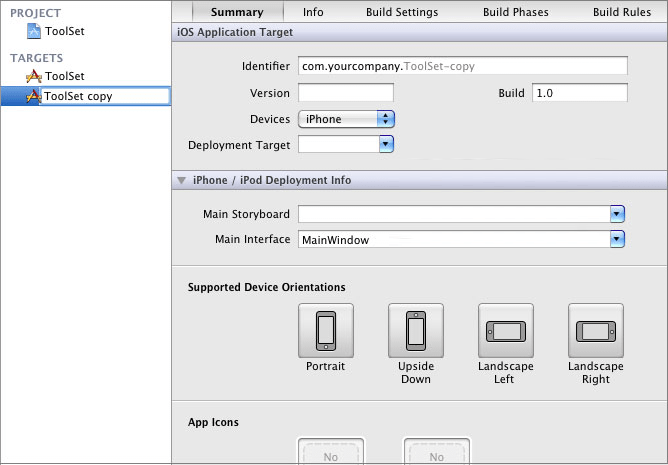
Step – 6
- Go to new target’s summary and pick app icon as well as splash for the new target/app
Step – 7
- Go to “Manage Schemes” under “Product Menu”
- Delete the schema created by xcode when target is duplicated (“Toolset copy” here) by choosing “-” at bottom
Step – 8
- Choose “+” and add the scheme created by yourself (“Toolset Lite” here)
That’s it you are done with the creation of the duplicate target. Now if you would have to distinguish between targets in code level you have to follow a few more steps mentioned here